Welcome back to the conclusion of our guide on using widgets inside of Profound UI. Catch up on the steps we covered in Part I here, and Part 2 here, and Part 3 here.
This series will explain how you can use widgets from a separate, unrelated library of widgets—PrimeUI—so that you can populate these widgets with data from a server and submit data from the widget back to the server. Not only will these widgets be usable in your production environment, you can also see them rendered in design-time in Visual Designer for drag and drop design.
This final article will walk you through a rich display application sample to demonstrate a PrimeUI widget in action inside of Profound UI.
Rich Display Application Sample using PrimeUI
If we take all the custom widget code from this article and add it to files that get loaded automatically with sessions of Profound UI, then we can build and run an application using the PrimeUI rating and date-picker.
The “custom-widget-autobind.js” file available in bottom of the other article (https://blog.profoundlogic.com/passing-custom-widget-input-data-to-server) should be placed in the “htdocs/profoundui/userdata/custom/js/” directory. (Note that that code does not work when the widget is inside a grid. See the comments by Nick Deppe for a version that does if you want to experiment with it. Better yet, ask us to support custom widgets in grids fully.)
The file at the bottom of this article, “primeui-widgets.js”, should be placed in the “htdocs/profoundui/userdata/custom/widgets” directory.
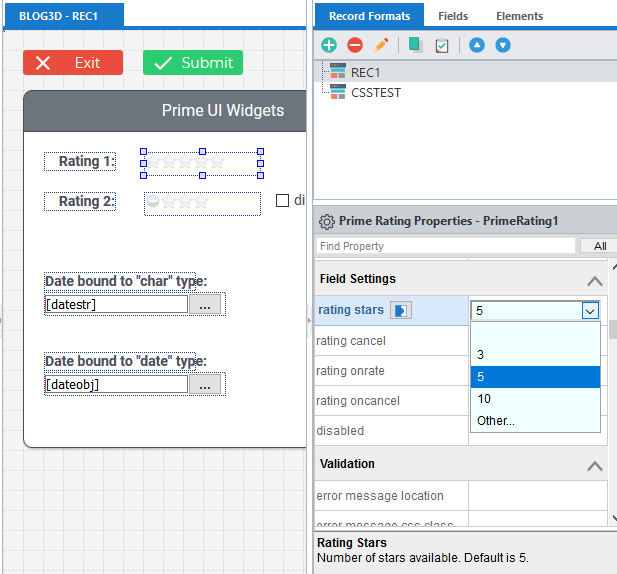
I have included a sample Rich Display File at the bottom of the article, as well. You can see that the PrimeUI rating and date picker widgets render in Visual Designer and can be dragged and dropped. They can be configured using the Properties Window:

Sample RPG code to run the display file is below:
**free
ctl-opt dftactgrp(*no);
dcl-f blog3d workstn handler(‘PROFOUNDUI(HANDLER)’);
btnExit = *Off;
DoU btnExit = *On;
ExFmt REC1;
If btnCheck = *On;
DoU btnBack = *On;
ExFmt CSSTEST;
EndDo;
btnBack = *Off;
btnCheck = *Off;
EndIf;
EndDo;
return;
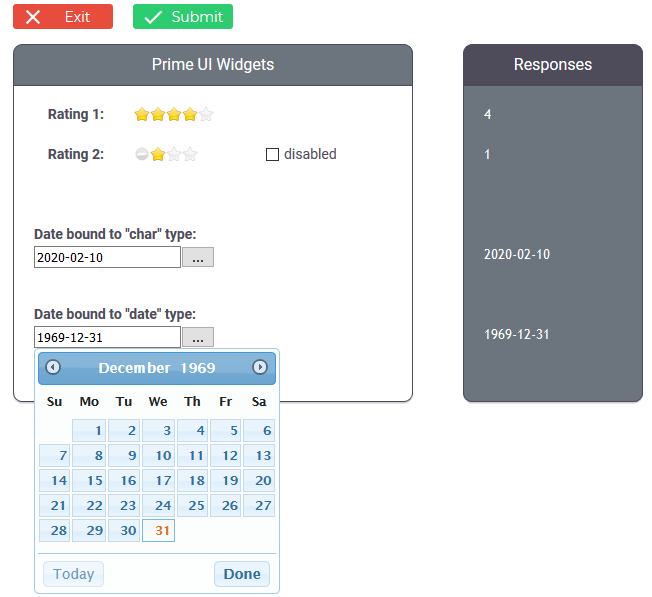
When you run the sample, you can see that the rating widget and date picker will display data from the server and can pass data back to the server:

Note also that the PrimeUI date-picker has a button to jump to today’s date, unlike the one built into Profound UI.
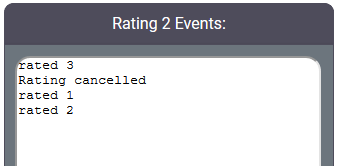
You can also see that when interacting with the second rating widget, the events are logged to the text-area:

That demonstrates that our event-handling property setters worked.
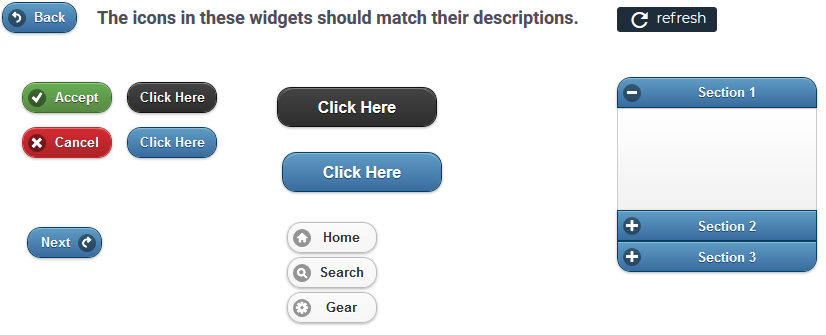
The second record format, CSSTEST, tests the CSS file, “prime-profound-fix.css”, included at the bottom of this article. If the CSS file exists, then in runtime and design mode you should see icons in buttons like shown below:

Without that fix, the icons are incorrect, and the non-icon button styling is broken.
Conclusion
As we’ve seen, you can drag-and-drop PrimeUI widgets onto a design canvas, and they can send and receive runtime data from the server just like Profound UI widgets. Some custom code is required but is somewhat straightforward; writing it for multiple widget properties is repetitive, provided you use code like we’ve supplied in this and the previous article.
If you are interested in a feature for Profound UI to automatically handle binding on custom widgets—without needing the extra file, “custom-widget-autobind.js”, then please contact our support staff, or post to our forums. If enough people show interest, then we can justify spending resources to work out a better solution. Bonus: custom widgets inside of grids would also be handled out-of-the box.


